
Oreo balls are the best no-bake dessert ever and require just 3 ingredients: Oreo’s, cream cheese and chocolate! This is one of my all-time favorite holiday treats but is delicious anytime– especially when you need to satisfy a chocolatey craving 🙂
If you love Oreo cookies, you will LOVE this dessert! Oreo balls are life changing– that sounds dramatic, but they are. How can a dessert SO easy be this mouthwatering?! If you’ve ever been to one of my holiday or white elephant parties, chances are you’ve definitely had these. I make them every year around Christmas because I can prepare a ton of them in no time at all and every year they FLY off the serving platters. People rave about these little chocolate balls of heaven that are so easy to make (& even easier to eat)!
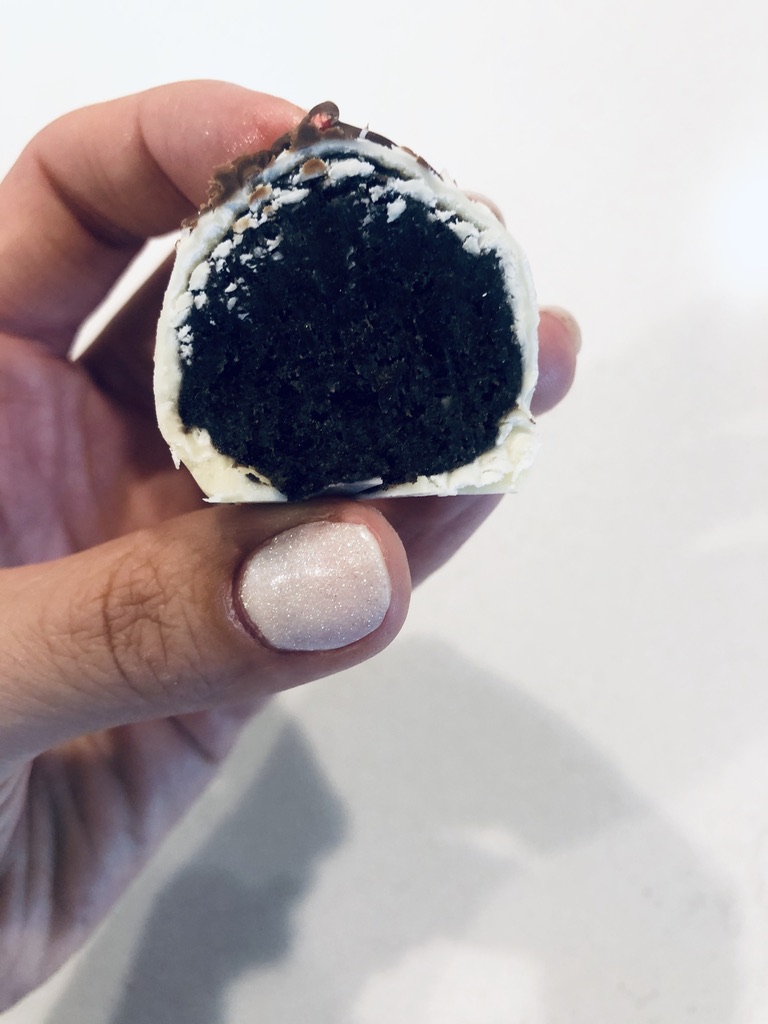
An Oreo cream cheese filling, rolled and dipped in chocolate… seriously, what could be better? I learned this recipe from my best friend’s momma when we were younger and have been making them ever since!

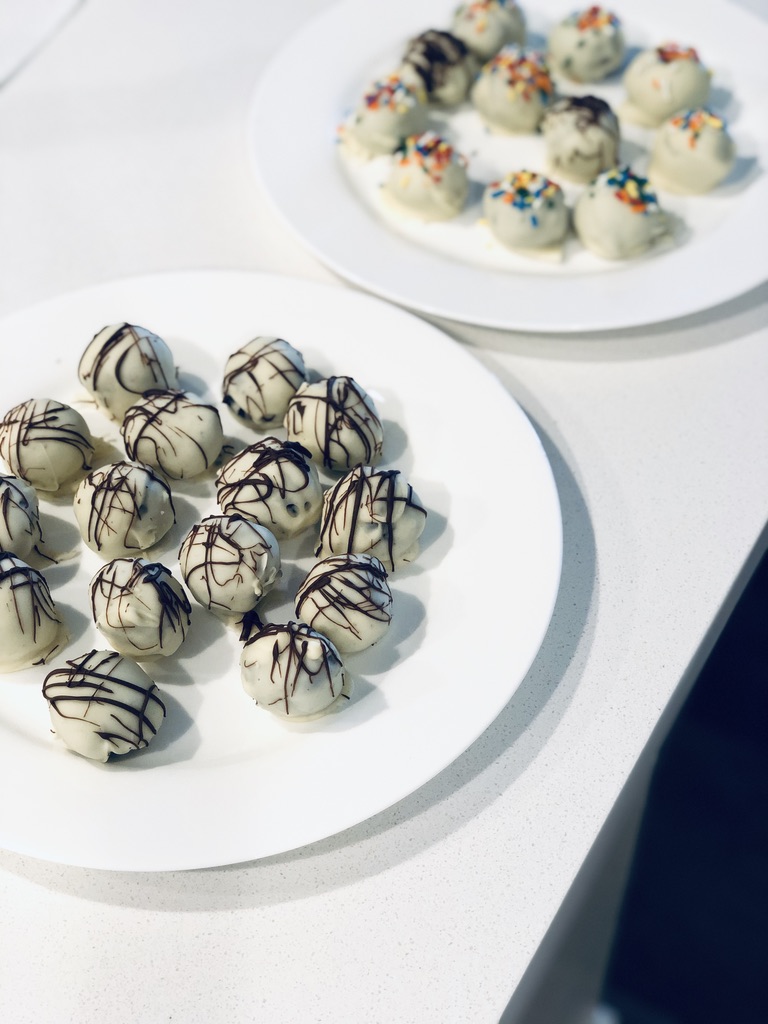
You can change out the toppings to fit any occasion! I made this batch for a friends birthday; I topped half with rainbow sprinkles and drizzled the other half in milk chocolate. I haven’t met anyone who doesn’t love these truffles. Do yourself a favor and give this recipe a try! I promise you won’t be disappointed ❤
What you’ll need to make the Oreo balls:
- 1 package of Oreo cookies
- 1 8oz package of cream cheese, cubed and softened
- 1-2 cups of melting chocolate (white, milk, semi-sweet)
- Optional toppings: sprinkles, crushed Oreo cookie, candy cane pieces, melted chocolate, or whatever your heart desires!
Recipe:

- In a food processor pulse together the entire package of Oreo cookies until smooth cookie crumbs. Note: If you don’t have a food processor you can put the cookies in a Ziplock bag and crush with a rolling pin! Also, if you plan to top your truffles with crushed cookie make sure to keep some off to the side.

2. In a mixing bowl combine cream cheese and Oreo crumbs together– you can also use a stand or hand-mixer for this step, but I typically do it by hand!

3. Mix together until smooth and no clumps of cream cheese remain.

4. Roll mixture into small balls (about 1 tbsp), and set on a baking sheet lined with a baking mat or parchment paper. I use these baking mats and love them! Place the baking sheets in the freezer for 15 minutes. If you don’t have room in the freezer you can chill them in the fridge for 30 minutes. Don’t skip this step or else dipping them in chocolate will be A MESS!

5. Melt chocolate either over a double broiler or in the microwave– I use the microwave because to me it’s way easier. You want your chocolate to be smooth and runny! Today I dipped all of my Oreo balls in white chocolate, but typically I dip half in white and half in milk chocolate.

6. Dip Oreo balls into chocolate, coating all sides. I like to do this using a fork so that all the excess chocolate can drip off over the bowl.
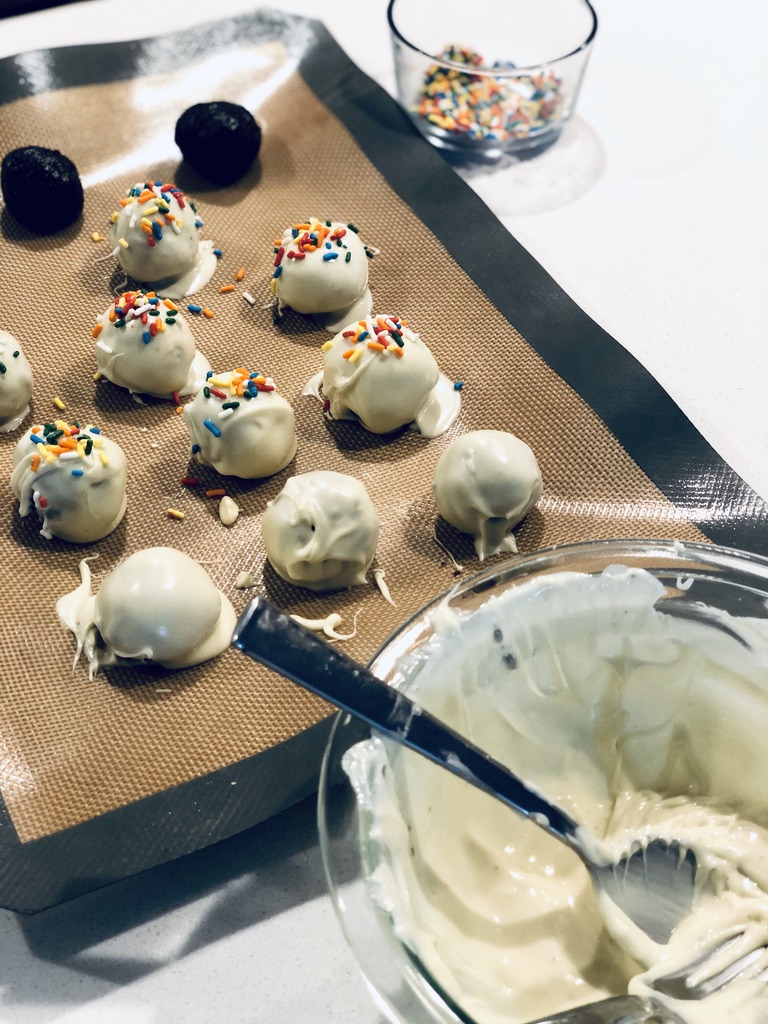
7. If you plan on using a topping other than chocolate drizzles on top of your Oreo balls (sprinkles, cookie crumbs etc.) the topping needs to be added while the chocolate is still wet. I am doing half rainbow sprinkles and half milk chocolate drizzle– the sprinkles are being added immediately after dipping.
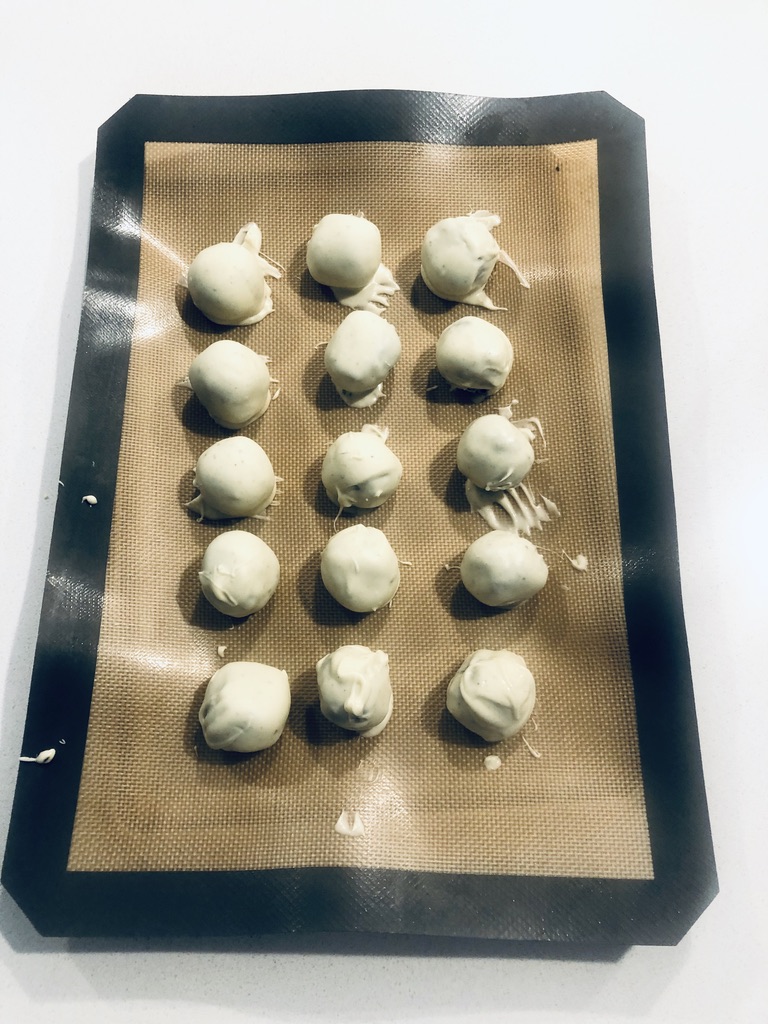
If you plan on doing a chocolate drizzle, pop the tray back in to the fridge for 5 minutes to allow the truffles to set.

8. Using a spoon drizzle the tops of the truffles with chocolate! Note: If you dipped the Oreo balls in milk chocolate, drizzle the tops with white chocolate.

9. Put truffles back into the fridge until the toppings have set.
Finally, ENJOY!! I prefer to eat my Oreo balls nice and chilled, straight from the fridge; Dylan prefers to set his out and allow them to come to room temperature. When serving at a party I usually set them out just as everyone is arriving!

Storing Instructions: Although these may be served at room temp, because of the cream cheese they must be stored in the fridge. For longer storage they can be put in the freezer in a freezer-safe bag or container. Transfer them to the fridge the day before (or at least a few hours before) you plan to eat them!
If you end up making these, leave a comment below and let me know what you think! If you post a picture to your social media, don’t forget to tag me and mention #clydescorner 🙂

Omg what a great recipe for weekend quarantine baking. I had no idea the baking mats were a thing. I ordered myself a set. Thank you Hayley for making my Thursday happy 🥰
LikeLiked by 1 person
Thank you! You’re going to love the baking mats 😍
Xoxo
LikeLike
Ahhh! I am such a sucker for anything Oreo. These are making my mouth water!
LikeLike