
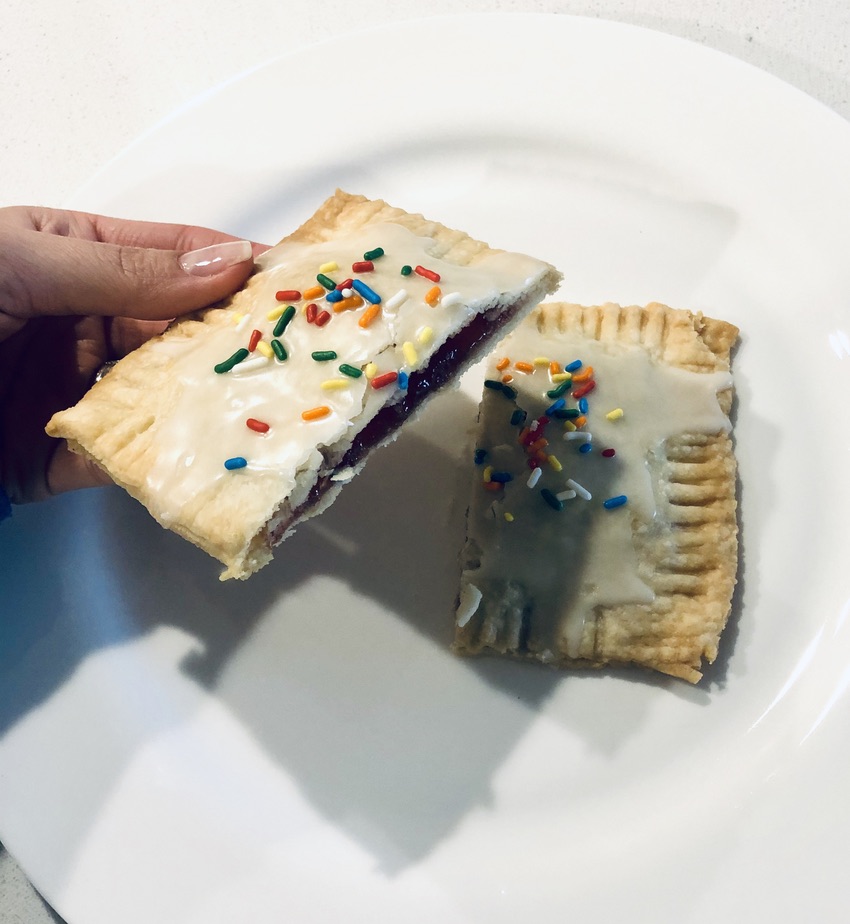
These strawberry pop-tarts are made with a buttery, flaky pie crust & filled with sweet, gooey, strawberry goodness, and they are oh so delicious! You simply won’t be able to stop after just one bite!
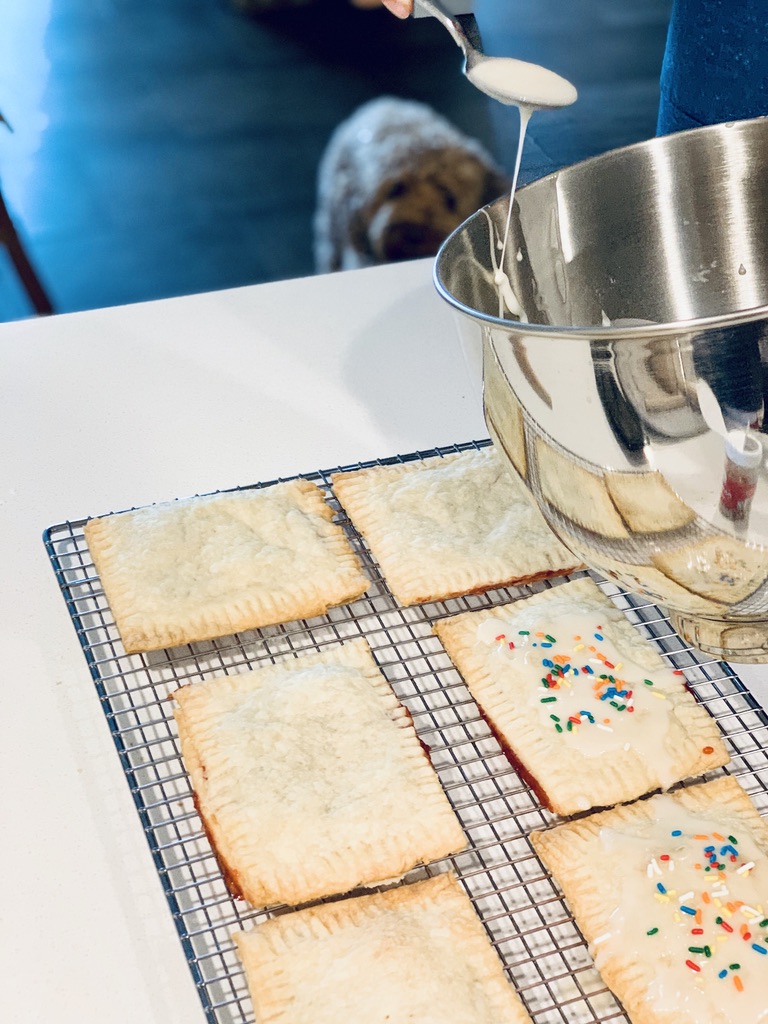
One of my favorite ways to start my morning is with a hot cup of coffee and a pastry– who’s with me?! Although this homemade strawberry pop-tart recipe is a little time-consuming for a breakfast pastry, you won’t be sorry you took the extra time… trust me. Not a morning sweets person? Not to worry; Dylan and I have been doing plenty of research, eating these bad boys morning AND night (all for you guys). Our conclusion: These tasty tarts double as the perfect dessert! So whether you decided to enjoy a homemade pop-tart at the crack of dawn with a cup of joe or at the end of your day with a big glass of milk, you are going to love them! Wyatt may or may not have had a taste too and he fully endorses these babies (you can see him lurking in the background of the picture below… how could I not let him have a taste?!).
If you’re not the biggest fan of strawberry, you can swap it out for a flavor you love! I’m using the Whole Foods brand strawberry conserves, and it tastes just like the filling of the boxed Pop Tarts I used to eat as a kid ❤ !
What you’ll need to make the pop tarts:
- 2 cups all-purpose flour (plus more for rolling)
- 1 cup unsalted butter, cold and cubed
- 1 tsp salt
- 1 tsp white granulated sugar
- 4 Tbsp ice water
- 1 cup strawberry conserves (you can use any flavor you’d like!)
What you’ll need to make the icing:
- 1 cup powdered sugar
- 1/4 tsp vanilla extract
- 1-2 Tbsp milk or half and half
- Optional: Rainbow sprinkles for “decorating“
Servings: 6 Large pop-tarts
Recipe:

- In a food processor, pulse together flour, salt & sugar 3-4 times. Slowly add cold cubed butter and pulse until it resembles cornmeal (see image above). Note: This step can be done without a food processor, use a pastry cutter or fork to cut butter into the mix just as you would when making a pie crust.

2. Add in 4 Tbsp of ice water and pulse until dough begins to come together. If dough is too dry, add 1 additional tbsp of ice water and continue to pulse.

3. Once dough comes together, turn it out onto a clean floured surface and form it into a ball.

4. Divide the dough in half and shape each half into a disk. Wrap each section of dough in plastic wrap and place in the fridge to chill for at least 1 hour.

5. Once chilled, remove one disk from the fridge to work with at a time. On a floured surface, roll dough out into a rectangle that measures approximately 13 x 11 inches.
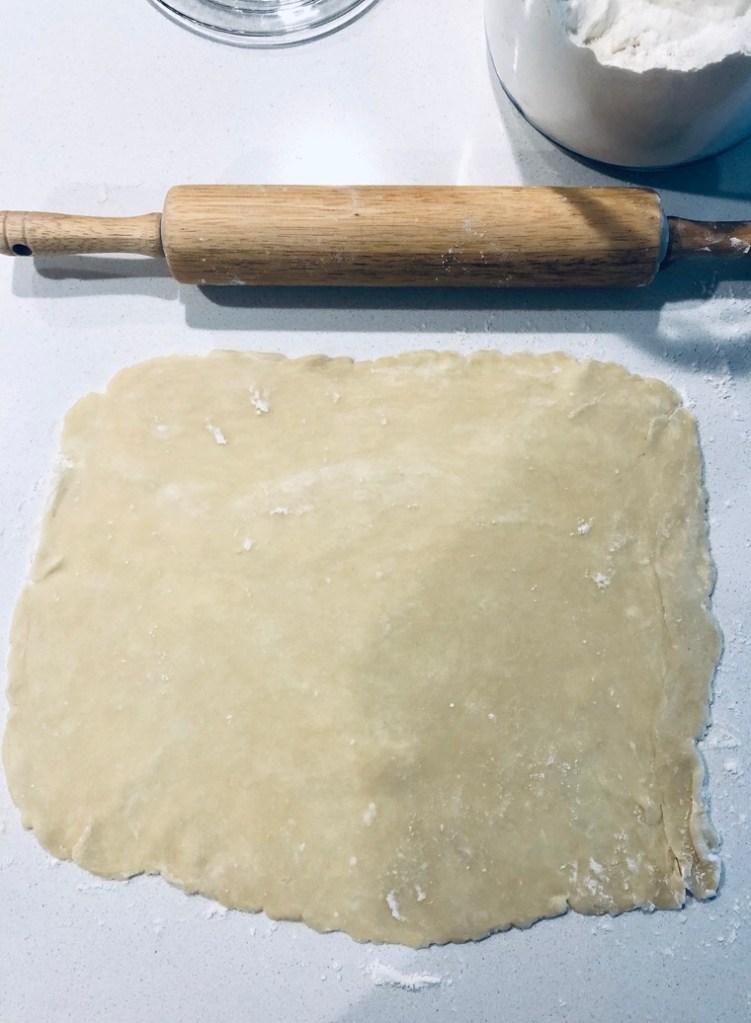
Note: Don’t worry if the edges of the dough begin to crack, you can re-seal them using your fingers as you roll. Your 13×11 inch rectangle should look something like the photo above! I highly recommend using a ruler (a tape measure works too) to measure your dough as you roll so you don’t over stretch it!
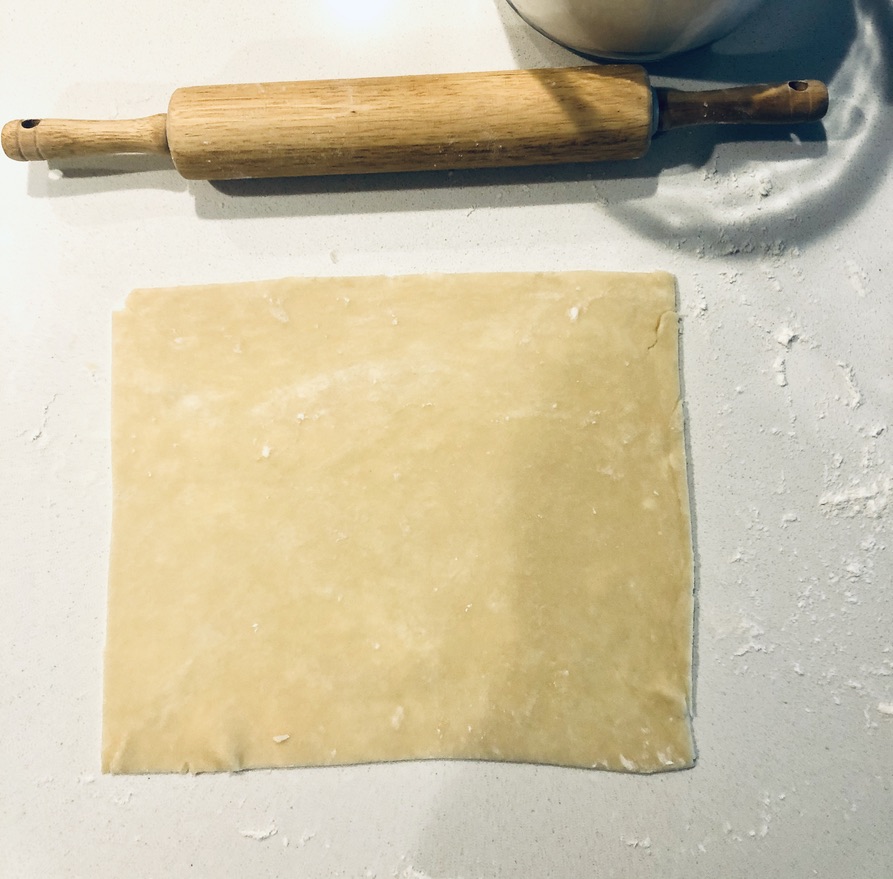
6. Trim the edges of your rectangle to measure 12 x 10 inches.
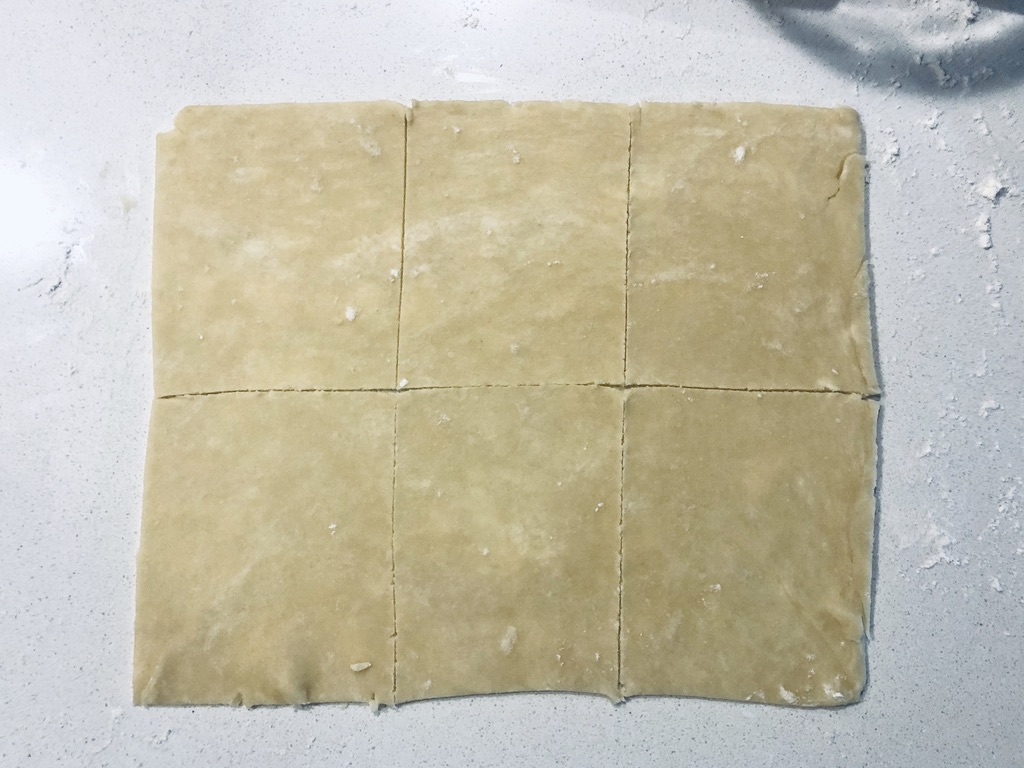
7. Cut 12 x 10 inch rectangle into 6 equal rectangles (shown above). Note: If you’d prefer to make smaller pop-tarts, cut the 12 x 10 inch rectangle into 8 equal rectangles; you will end up with 8 pop-tarts total instead of 6!
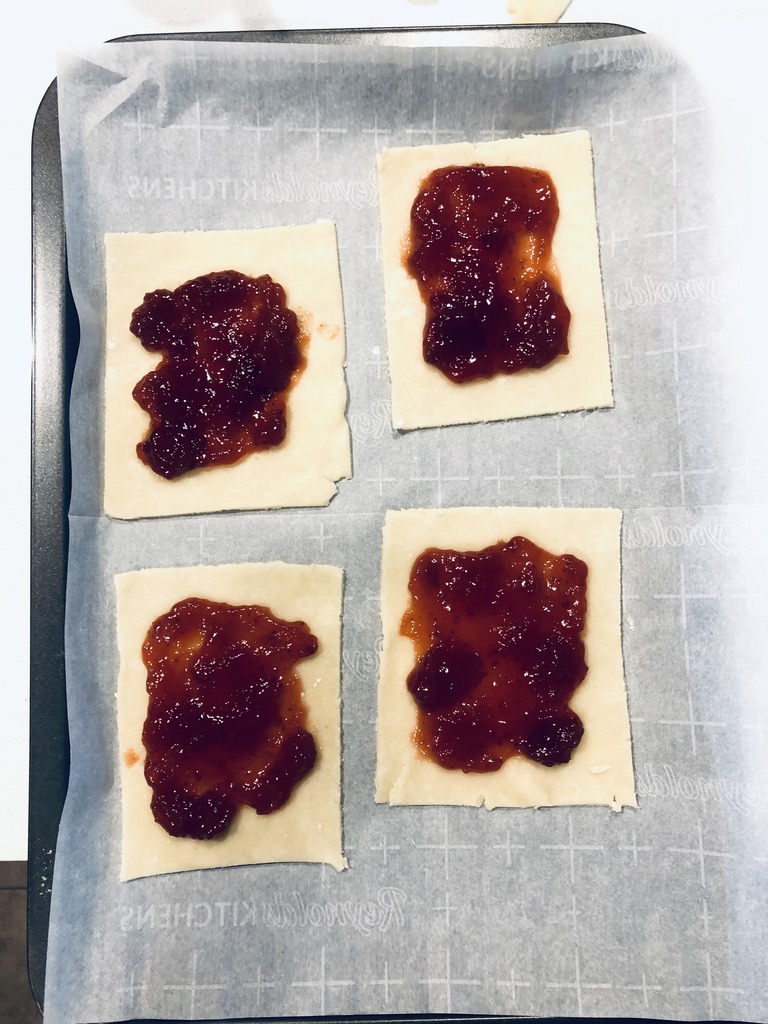
8. On a baking sheet lined with parchment paper, arrange 4 of the rectangles. Top each with 1-2 Tbsp of strawberry conserves, leave a small rim of dough uncoated all the way around.

9. Top each with another rectangle of dough, sealing all the way around with a finger, and then crimp with a fork. Use a toothpick to make 4 small holes in the top of each pop-tart. Repeat these steps with second disk of dough. Cover both baking sheets with plastic wrap and place in the freezer for 2 hours.

10. Preheat oven to 375 degrees. On two separate racks, bake both trays of frozen pop-tarts for about 25 minutes, rotating trays half way through. Note: Even if edges are well-sealed, some filling may spill out during baking!

11. Allow pop-tarts to cool completely on a wire cooling rack before icing them. While they cool, prepare the icing.

12. To make the icing: mix together powdered sugar, vanilla, and half and half (or milk). If the icing is too runny, add more powdered sugar; if icing is too thick, add a little more half and half!
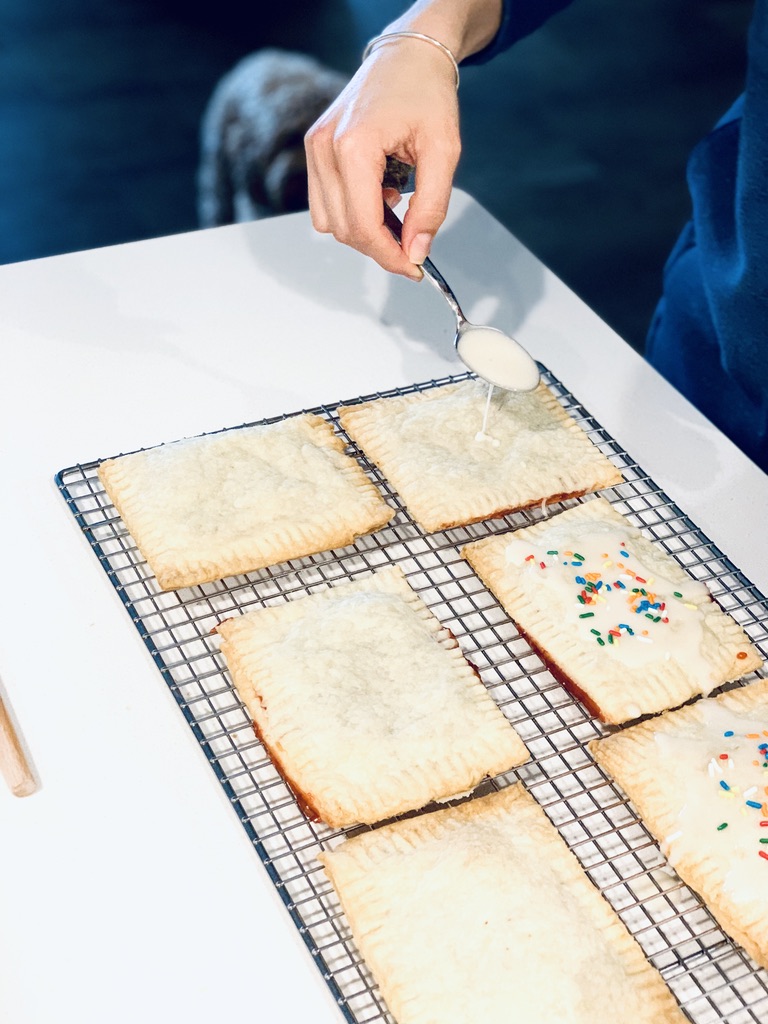
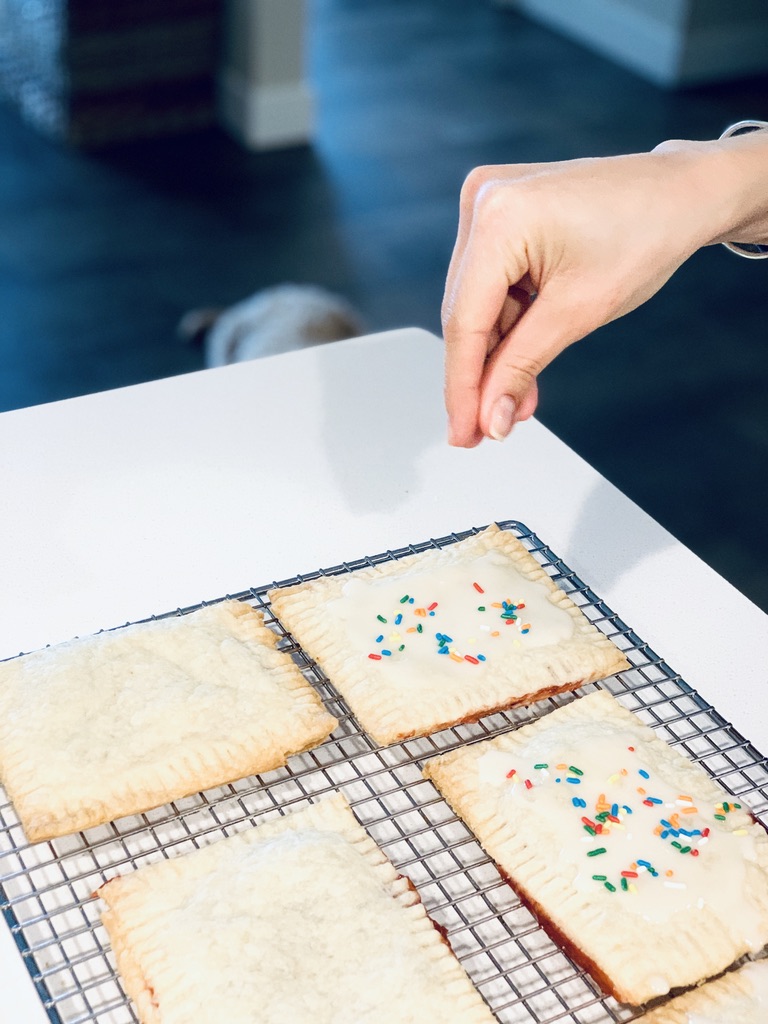
13. Ice your pop-tarts and top with sprinkles!

Just remember these are HOMEMADE, they don’t need to be perfect! ❤

I hope you enjoy these tasty strawberry pop-tarts! Leave a comment below and tell me what you think 🙂 . If you end up making them, post a picture to your social media account and don’t forget to tag me!
Source: This recipe was modified from Cooking Classy

Looks like a yummy springtime treat!
LikeLiked by 1 person
Thank you!
LikeLike
Oh my gosh, how cute are these! Thanks for sharing your recipe. ♡
LikeLiked by 1 person
Thanks so much for the sweet comment!
LikeLiked by 1 person